Heads up: This post may have affiliate links. As an Amazon Associate, I earn from qualifying purchases.
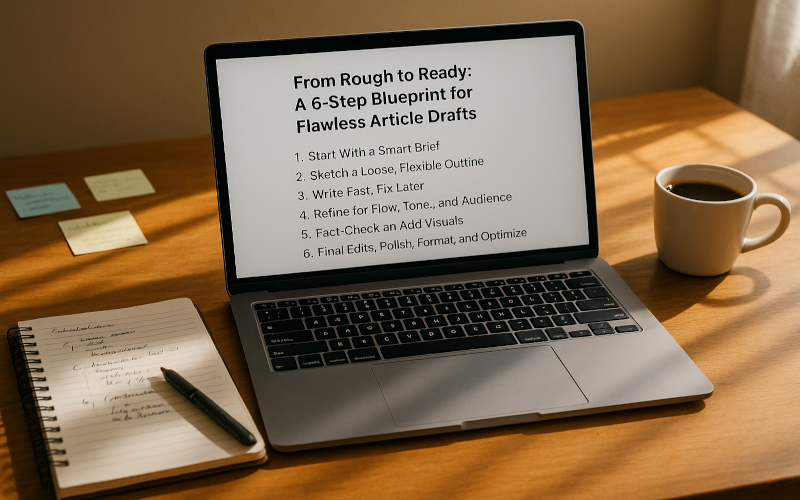
From Rough to Ready: A 6-Step Blueprint for Flawless Article Drafts
Have you ever sat down to write an article and found yourself stuck after the first few sentences? Maybe you start strong with an idea, but halfway down the page, your words lose steam, your message drifts, and you’re left with a messy draft that feels more like scattered thoughts than a finished piece.
If this sounds familiar, you’re not alone. Writing, even for seasoned professionals rarely starts out polished. Behind every clean, well-structured article you admire, there’s usually a rough first draft that looked nothing like the final product.
The truth is, great writing is less about talent and more about process. With the right steps, you can take any rough draft and refine it into something clear, engaging, and ready to publish.
That’s where this 6-step blueprint for flawless article drafts comes in. It’s practical, repeatable, and best of all flexible enough to fit any style of writing, whether you’re blogging for fun, drafting thought leadership content, or creating resources for your business.
Let’s break it down.
Step 1: Start With a Smart Brief
Think of a brief as your north star. It’s not just busywork it’s the foundation of everything that follows. Without it, you risk wandering off track and creating something unfocused.
A smart brief answers essential questions before you begin:
-
Who’s the reader? Are they beginners, experts, or casual browsers?
-
What’s the goal? Do you want to inform, persuade, or entertain?
-
What’s the main takeaway? What should the reader know or do by the end?
-
What’s the tone? Should it be formal, friendly, or conversational?
-
What’s the SEO focus? Which keywords and topics matter most?
👉 Example: If you’re writing an article about “meal prepping for busy professionals,” your brief might highlight: a target reader who’s strapped for time, a promise to save money and stress, and a tone that’s approachable but authoritative.
📌 Action tip: Keep briefs short and simple half a page is plenty. The point is clarity, not overplanning.
“A smart brief is your compass. Without it, you may still reach a destination, but it probably won’t be the one you intended.”
Step 2: Sketch a Loose, Flexible Outline
Once you’ve got your brief, it’s time to map the route. That’s your outline.
The biggest mistake? Making it too rigid. Overplanning every subheading and sentence can suffocate creativity. Instead, aim for a framework that gives direction without boxing you in.
A simple outline might look like this:
-
Hook + intro
-
Key points (3–6 main sections)
-
Conclusion + call to action
👉 Storytime: I once worked with a writer who refused to outline. Every draft turned into a 3,000-word ramble that had to be cut in half. When they finally tried a loose outline, their writing was sharper, faster, and more engaging without losing personality.
Think of your outline as scaffolding. It keeps you steady while building but doesn’t dictate every brick.
Step 3: Write Fast, Fix Later
This step separates struggling writers from productive ones.
Here’s the harsh truth: perfectionism kills momentum.
When you pause after every sentence to tweak wording or fact-check, you break the flow. Writing becomes painful and slow. Instead, separate the creative phase from the editing phase.
Some strategies that work:
-
Pomodoro technique: Write in 25-minute sprints, no edits allowed.
-
Placeholders: Write “[insert stat here]” or “[better phrasing needed]” instead of stopping.
-
Momentum over polish: Aim for progress, not perfection.
👉 Imagine you’re pouring clay onto a wheel. At first, it’s messy and shapeless. That’s okay you need raw material before you can sculpt.
“Write fast, fix later. Your first draft is supposed to be ugly it’s the raw material for brilliance.”
Step 4: Refine for Flow, Tone, and Audience
Now comes the sculpting. You’ve got clay on the wheel; it’s time to shape it.
This stage is all about reader experience. Ask yourself:
-
Does each idea flow naturally into the next?
-
Is the tone consistent and aligned with the audience?
-
Are sentences clear, concise, and free of jargon?
👉 Trick of the trade: read your draft aloud. If it sounds awkward or confusing, it’ll read that way, too.
Example: Instead of saying, “The utilization of time management strategies is beneficial for productivity,” rewrite it as, “Using time management strategies makes you more productive.”
Simple. Conversational. Direct.
Step 5: Fact-Check and Add Visuals
Credibility is nonnegotiable. A single unchecked claim can undermine your authority.
Here’s your fact-checking checklist:
-
Verify all statistics with trusted sources like Pew Research or CDC.
-
Double-check names, dates, and quotes.
-
Ensure internal links point to reliable, relevant content.
Beyond facts, add visuals to boost engagement:
-
Infographics to simplify data
-
Screenshots for tutorials
-
Charts or graphs for comparisons
-
Photos that support the mood
👉 Case in point: Articles with visuals get 94 percent more views than those without (source: HubSpot).
“Words tell, but visuals show. Combine both, and your article goes from informative to unforgettable.”
Step 6: Final Edits: Polish, Format, and Optimize
The last mile can make or break your article.
Here’s your final polish checklist:
-
✅ Run grammar and spell check
-
✅ Format with H2s, H3s, and bullet points
-
✅ Add alt text to images
-
✅ Optimize for SEO: meta description, keyphrase density, internal links
-
✅ Tighten sentences cut the fluff
👉 Example: Instead of, “At this point in time, you should make the effort to review your draft thoroughly,” try, “Now’s the time to review your draft thoroughly.”
Cleaner. Stronger. Reader-friendly.
When you’ve finished this step, your article isn’t just written it’s ready to publish with confidence.
FAQs
Q1: How long should a good article draft be?
It depends on your goal. SEO-friendly blogs often run 1,500–2,500 words, while quick opinion pieces may be 800–1,200.
Q2: What’s the biggest mistake writers make in drafting?
Editing too early. It slows you down and kills flow. Always write first, then edit.
Q3: Do I really need visuals in every article?
Not every time, but visuals improve retention and readability. Even one chart or image can make a big difference.
Next Steps
The blank page doesn’t have to be intimidating. With this 6-step blueprint for flawless article drafts, you now have a repeatable process to turn rough ideas into polished articles.
Remember:
-
Brief smartly.
-
Outline loosely.
-
Write fast.
-
Refine carefully.
-
Fact-check thoroughly.
-
Polish completely.
📌 Your action step: Take your next draft whether it’s a blog, report, or essay and run it through these six steps. Notice how much smoother, clearer, and faster your process becomes.